Let’s build a blog with Quarto
Websites share:
- navigational elements
- rendering options
- visual style
Blogs are a specific type of website:
- listing of posts
- navigational page that lists them in reverse chronological order
- publish an RSS feed
Getting started with a new Quarto blog
Create a new blog in the terminal:
quarto create-project my-new-blog --type website:blogIf you are using RStudio, you can use the New Project command to create a Quarto Blog:
Preview and render your blog
- To preview the site, use the
previewcommand in the terminal:
quarto preview mysiteThe development server will automatically re-render input files whenever they change.
- To render the site, use the
rendercommand in the terminal:
quarto render mysiteMake sure to render before pushing up changes!
If you are using RStudio, you can do this in the IDE’s Build tab. Be sure to check “Render on Save”:
Quarto blog files
When you create a new blog, these files will be automatically populated in your directory:
Creating project at myblog:
  - Created _quarto.yml
  - Created index.qmd
  - Created posts/welcome/index.qmd
  - Created posts/post-with-code/index.qmd
  - Created about.qmd
  - Created styles.css
- Created posts/_metadata.yml| File | Description |
|---|---|
_quarto.yml |
Quarto project file. |
index.qmd |
Blog home page. |
about.qmd |
Blog about page. |
posts/ |
Directory containing posts |
posts/_metadata.yml |
Shared options for posts |
styles.css |
Custom CSS for website |
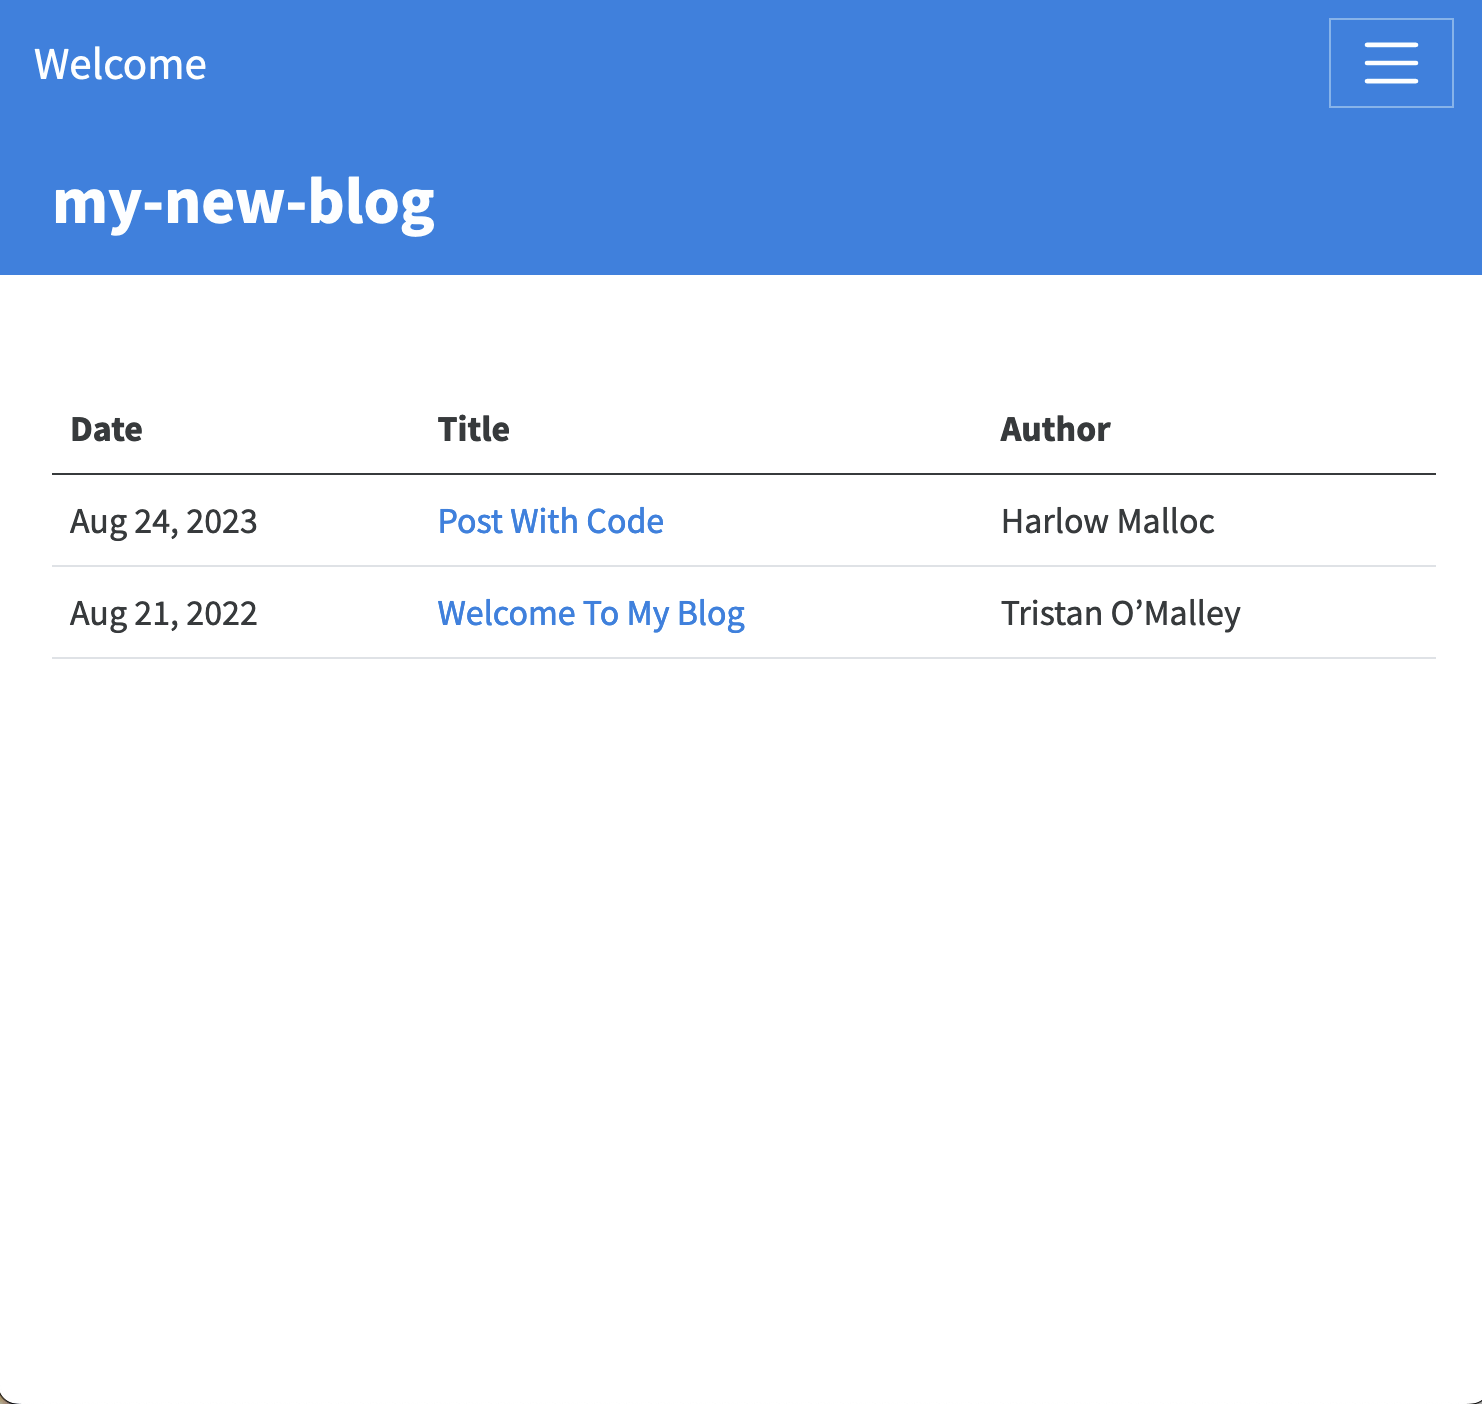
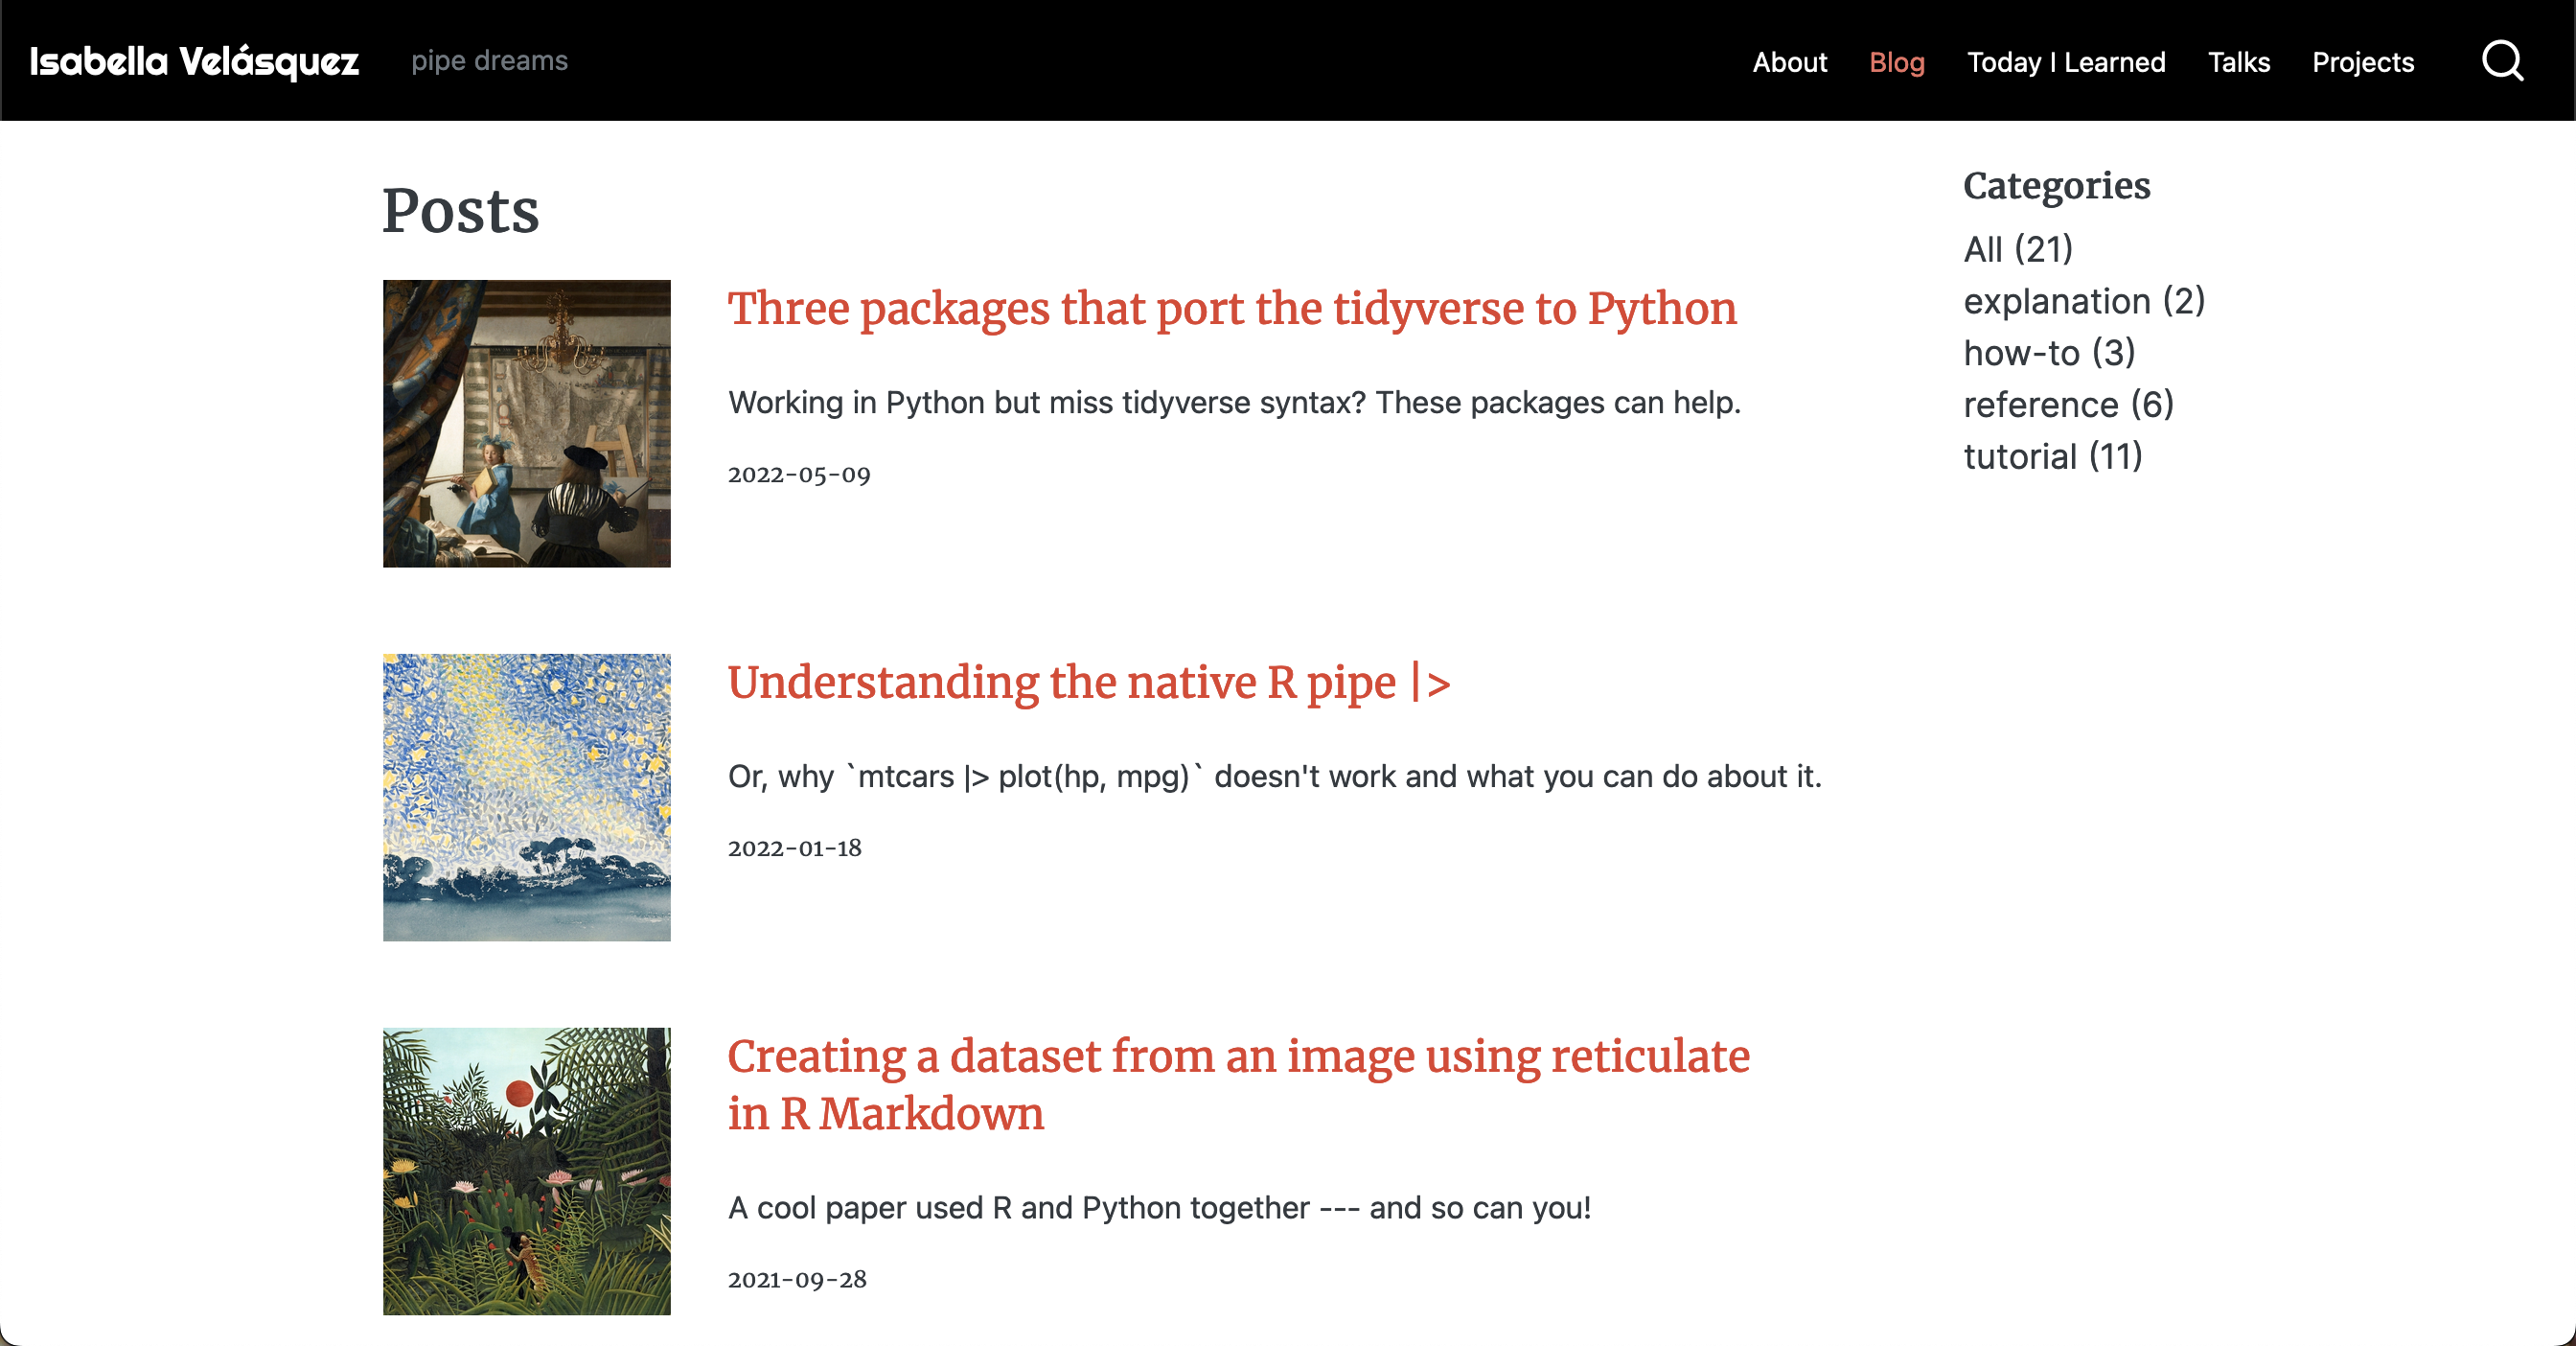
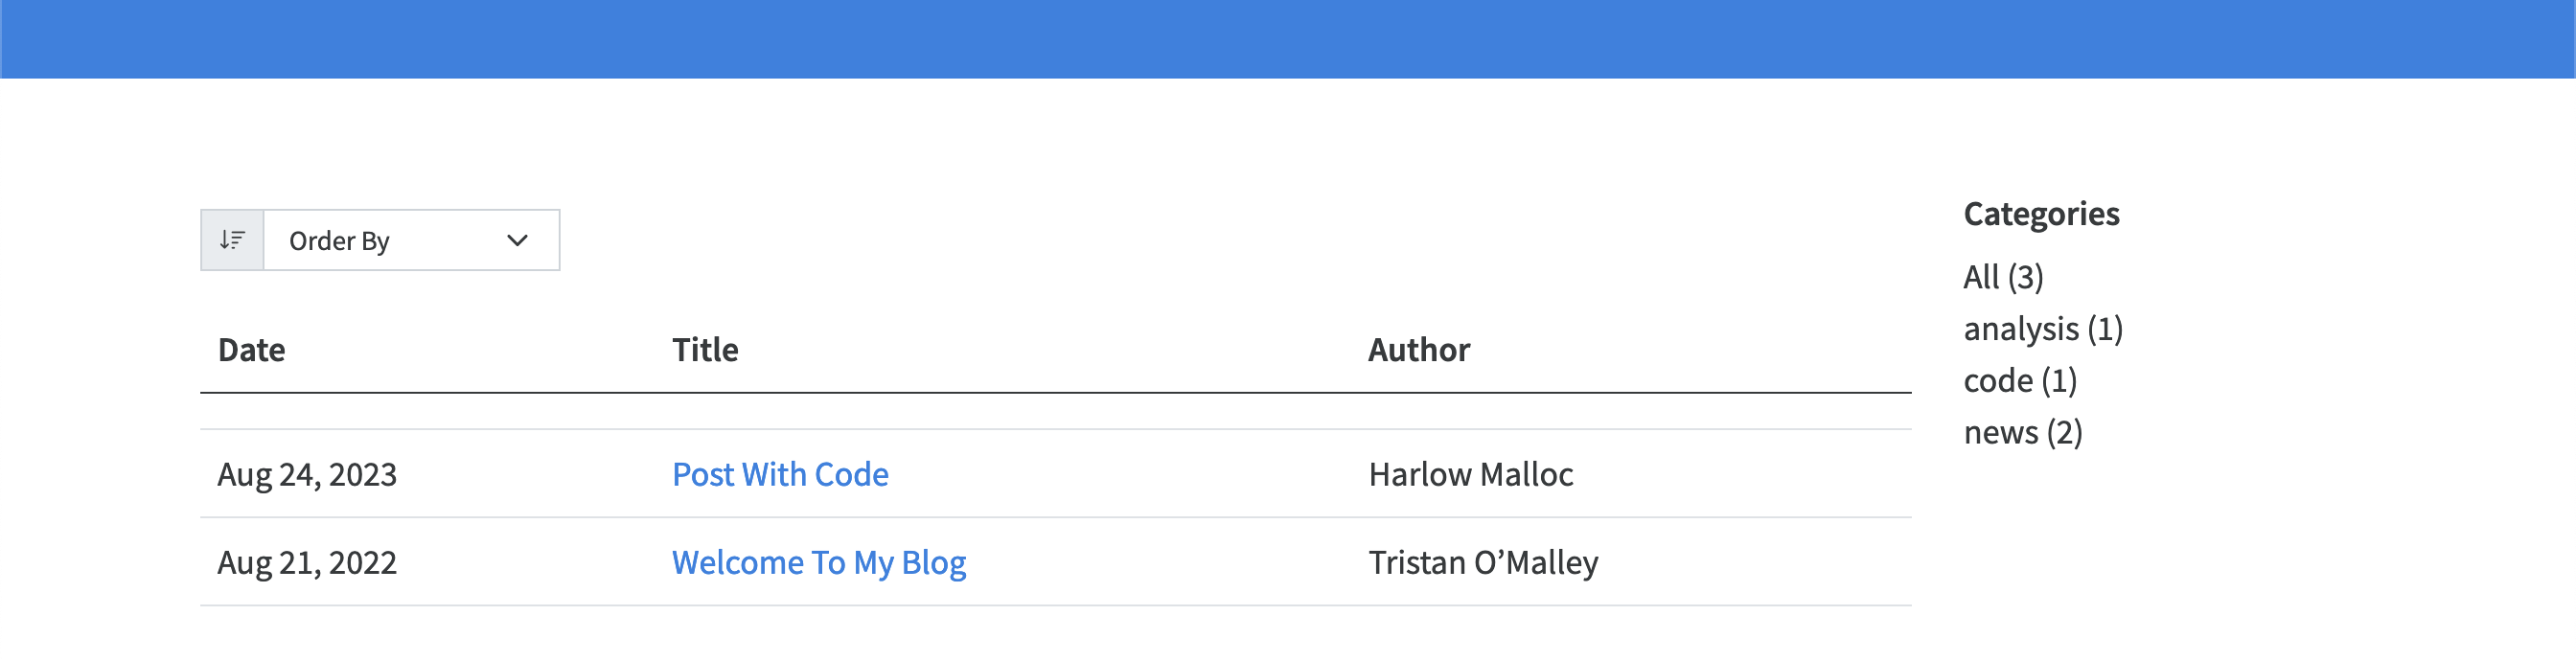
index.qmd: Blog home page
The index.qmd file in your home directory will be the landing page for your site.
- When creating a new blog, it will default to the listing page for the documents in the
postsdirectory. - If you prefer that the About page is your landing page, you can rename your
index.qmdtoposts.qmdandabout.qmdtoindex.qmd.
---
title: "my-new-blog"
listing:
  contents: posts
  sort: "date desc"
  type: default
  categories: true
  sort-ui: false
  filter-ui: false
page-layout: full
title-block-banner: true
---
Let’s go through each line:
title
The title of your listing page.
listing
listings generates the contents of a page (or region of a page) from a set of Quarto documents or other custom data.
contents
contents control what documents are included in the listing by specifying a set of input files.
contents: postscontains documents from theposts/folder.
sort
sort controls the order of the listing.
sort: "date desc" sort: "date asc" sort: "title asc" sort:
- date desc
- title desctype
type controls how the listings look.
Three default styles:
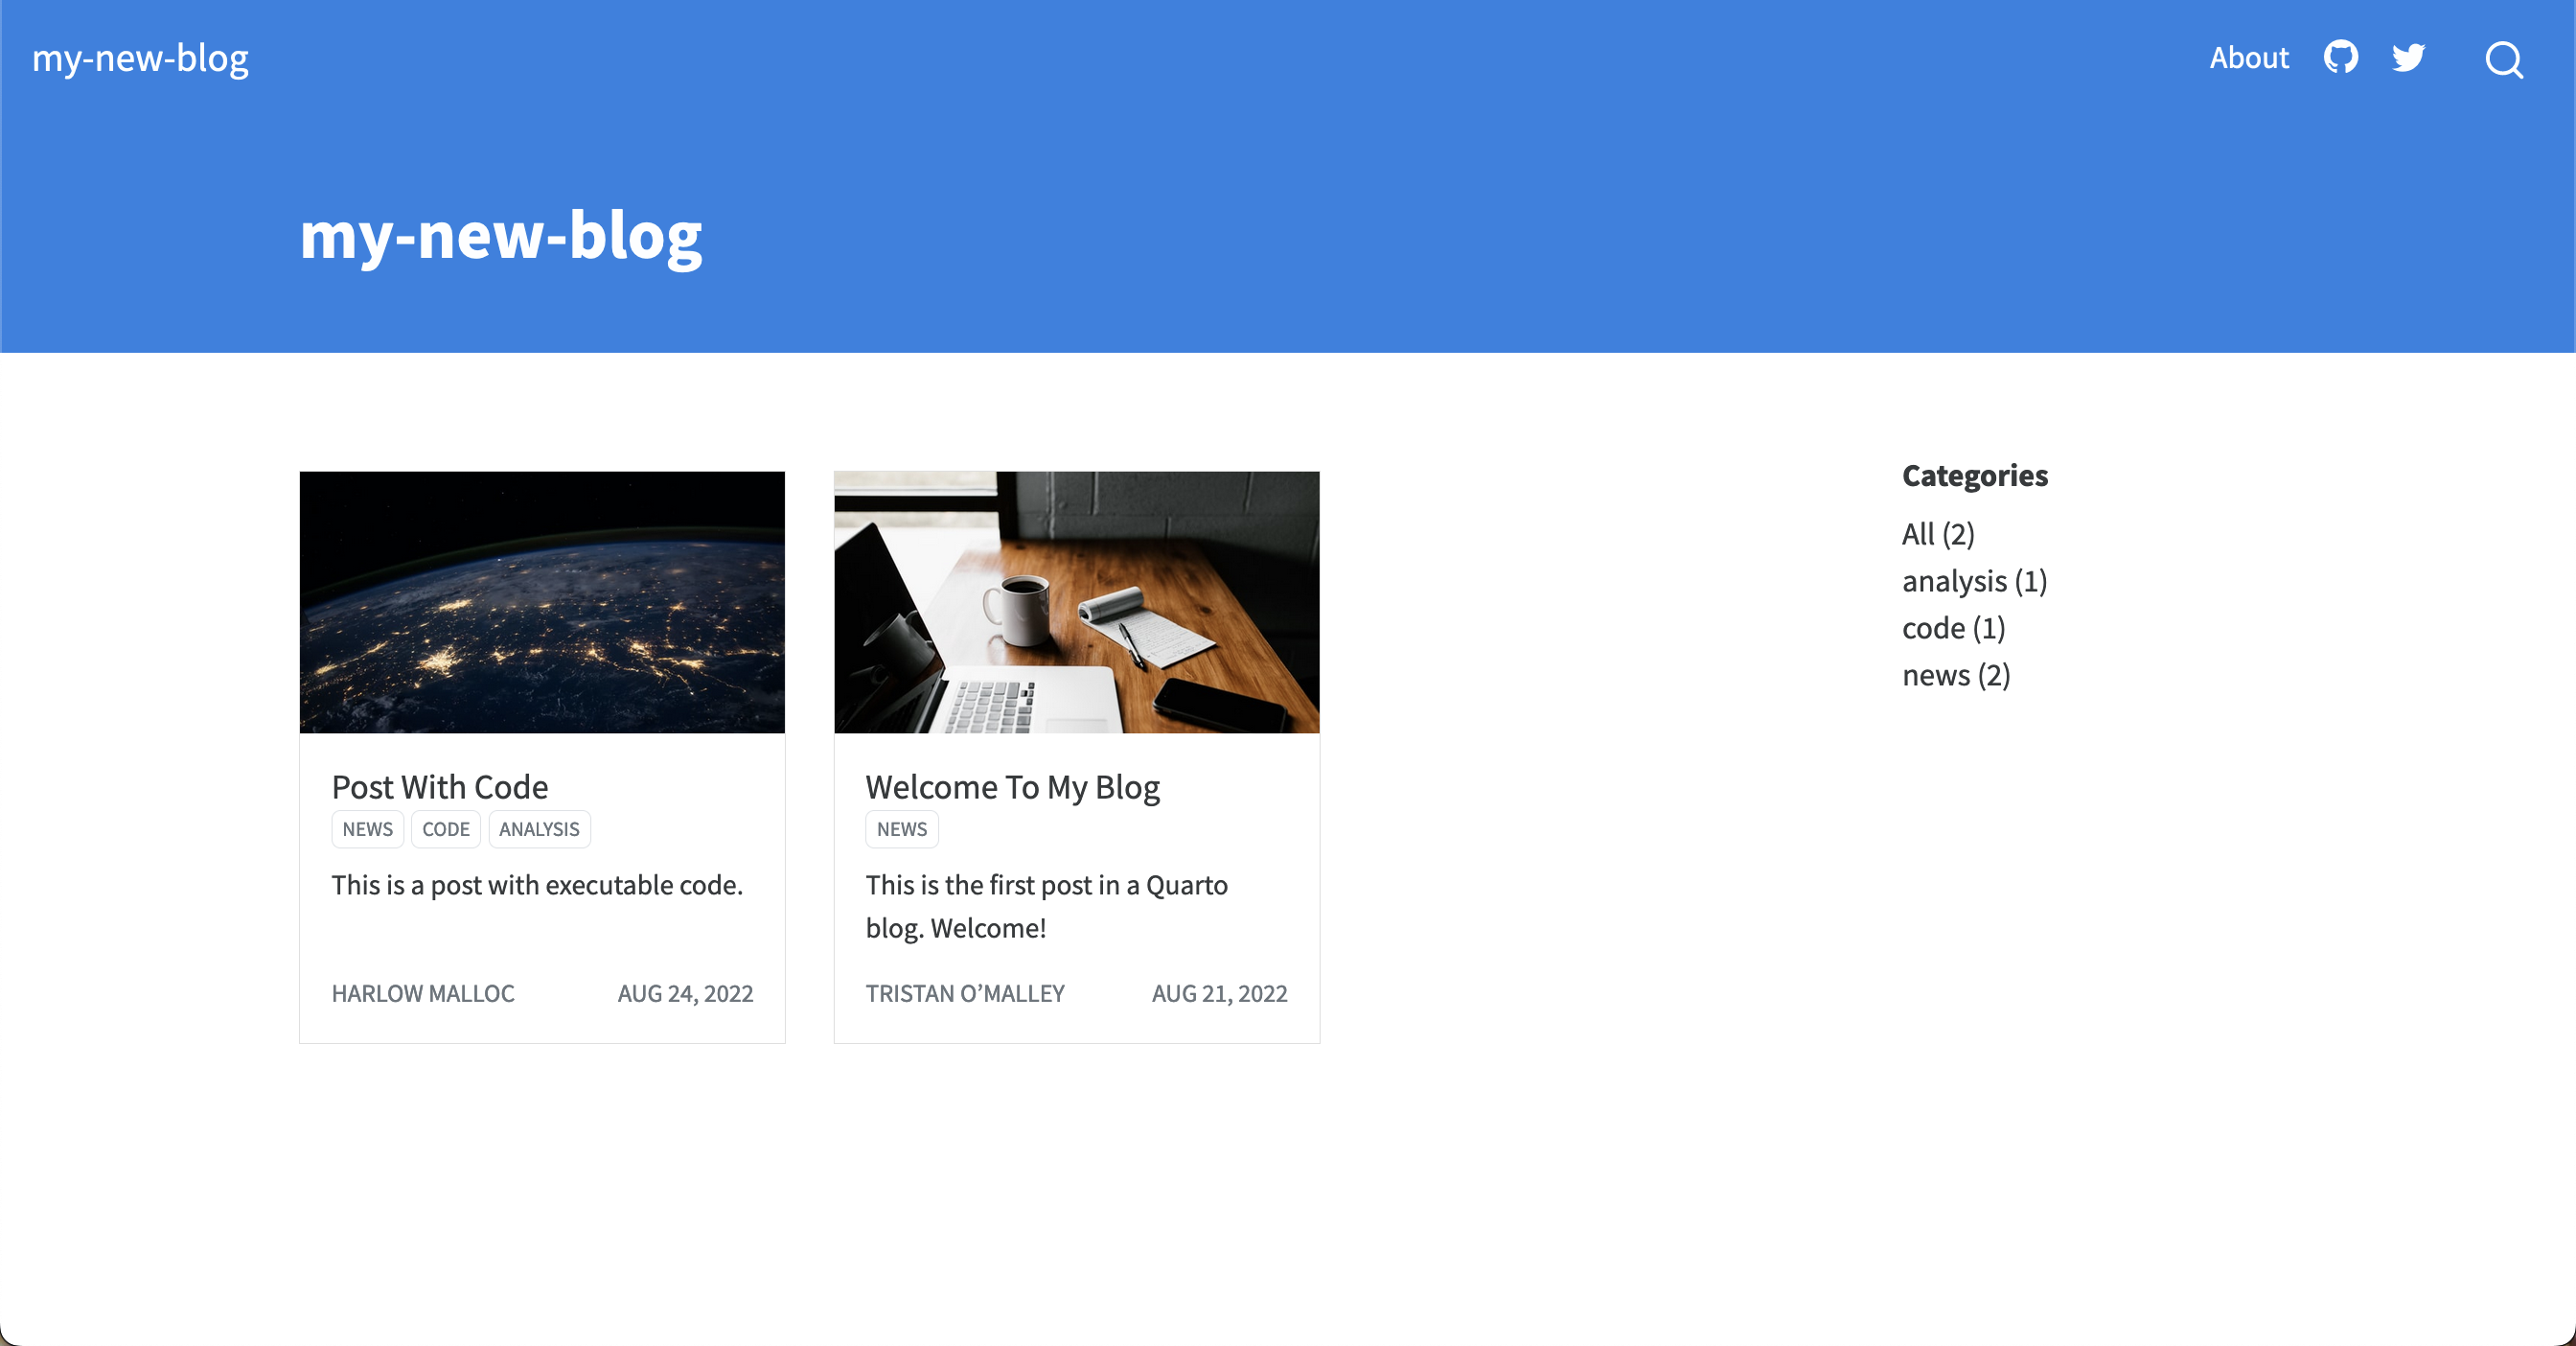
type: grid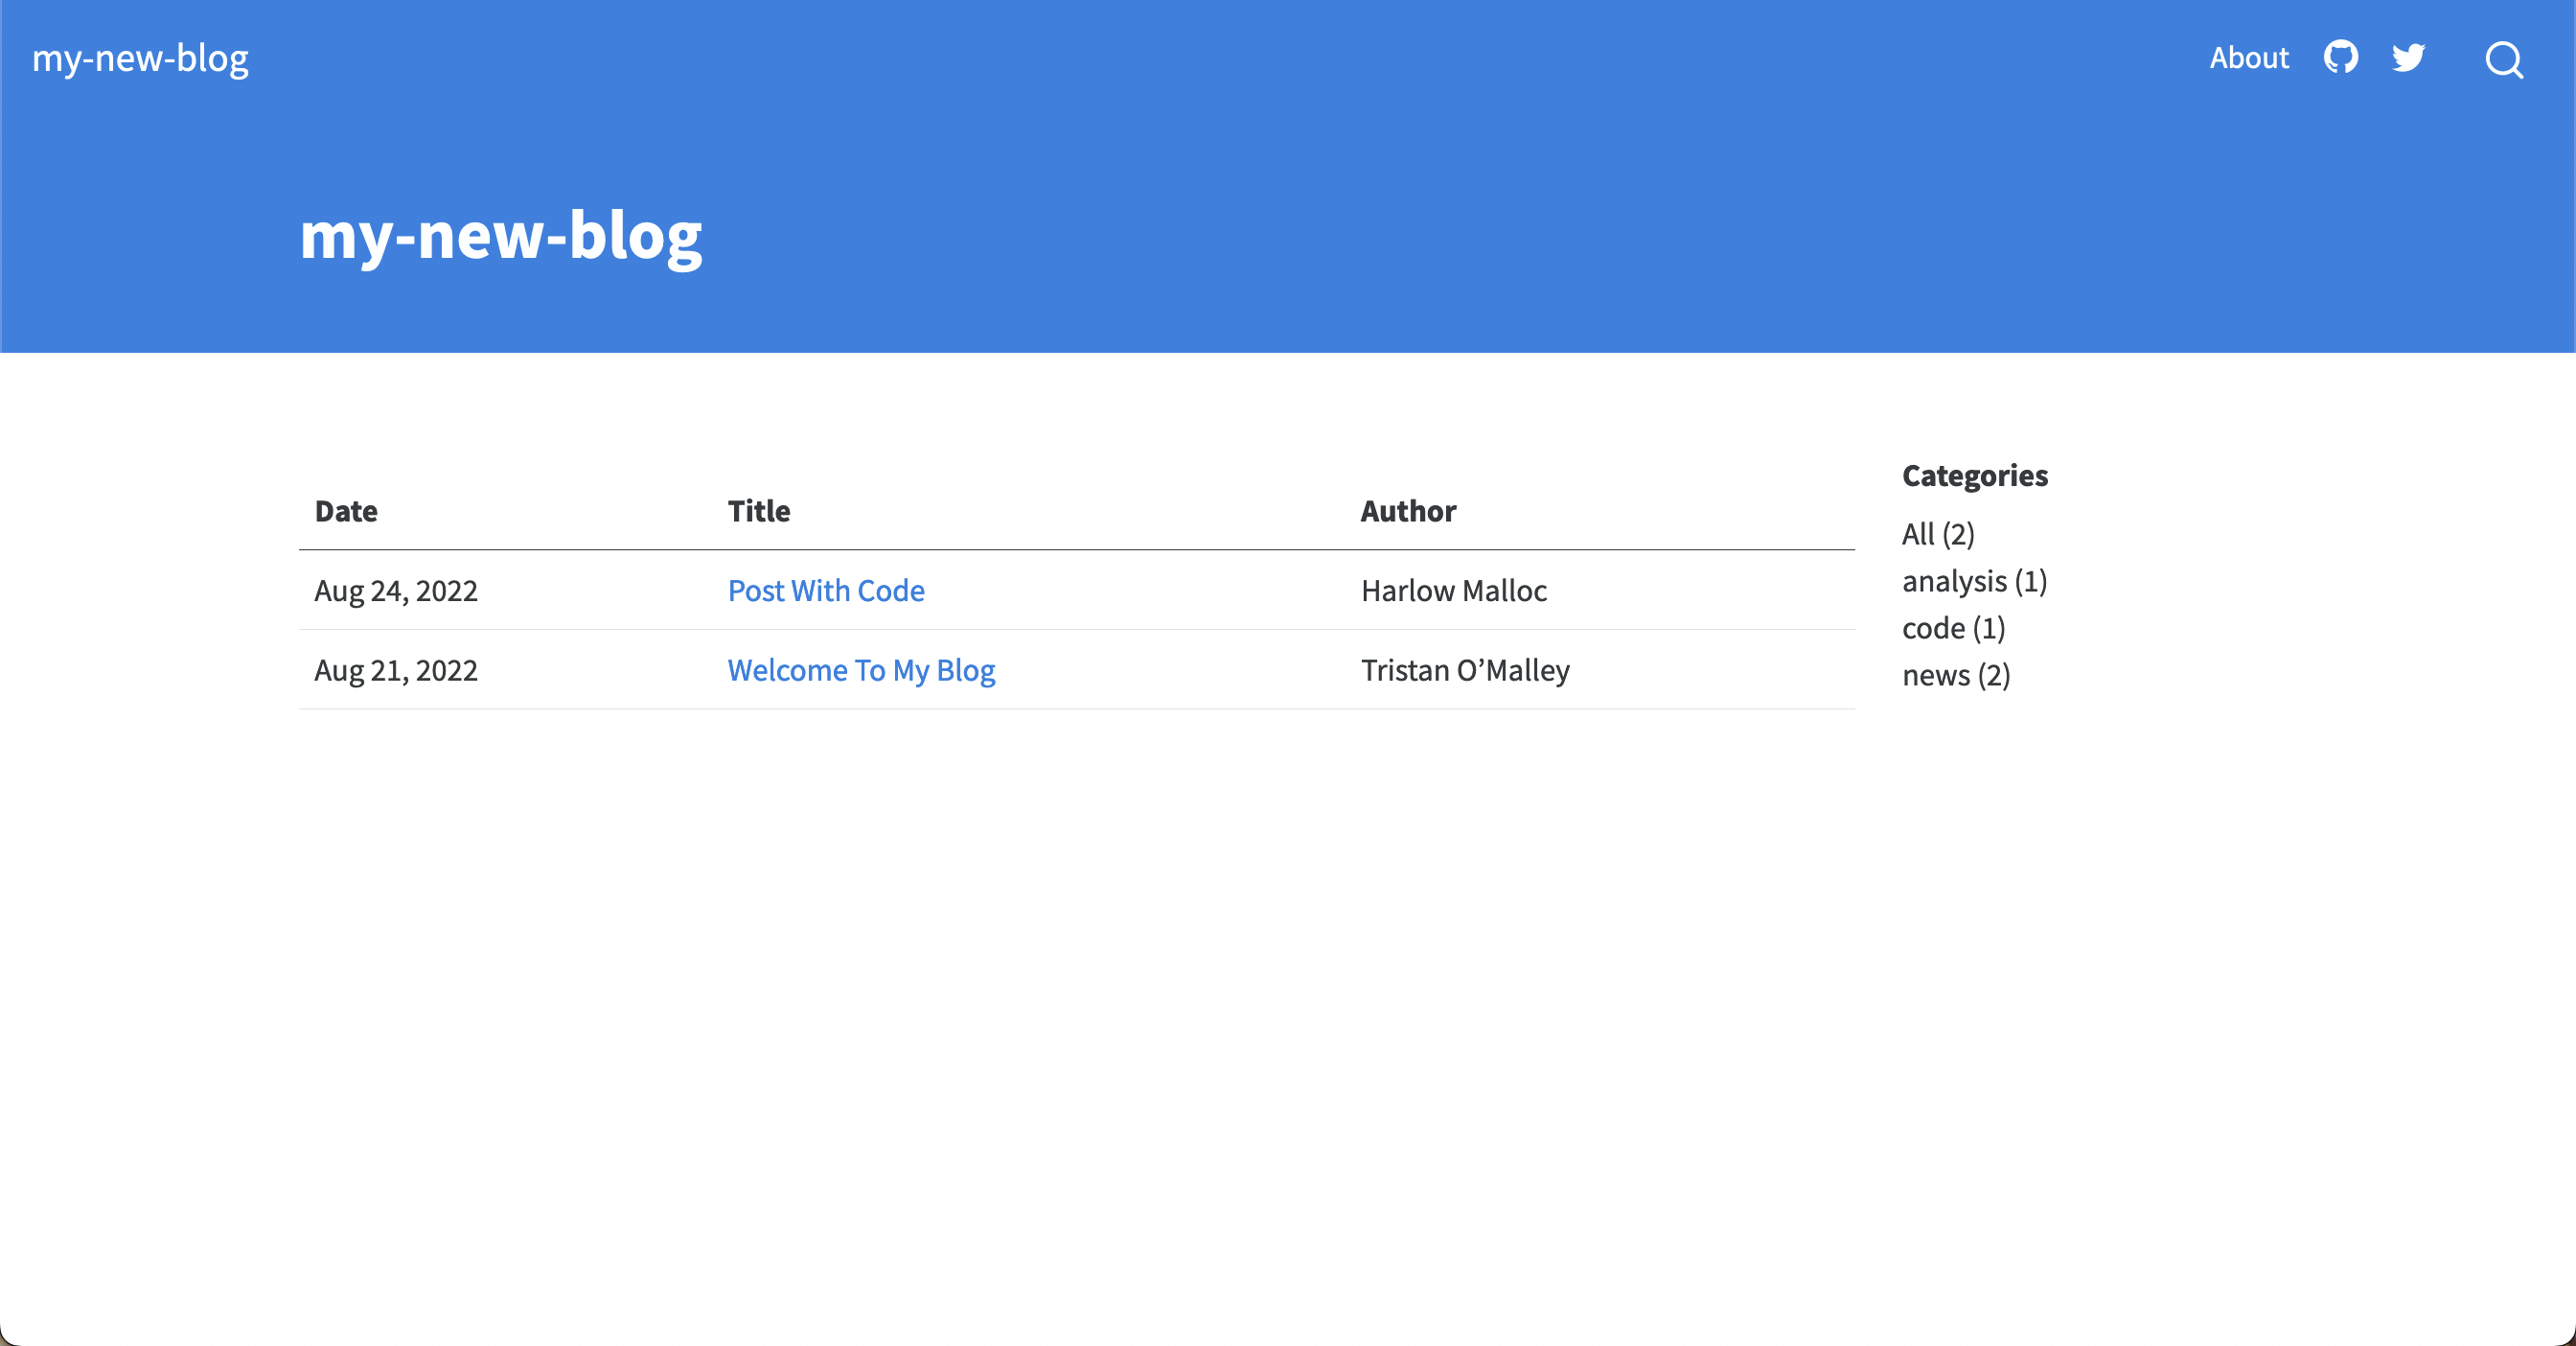
type: table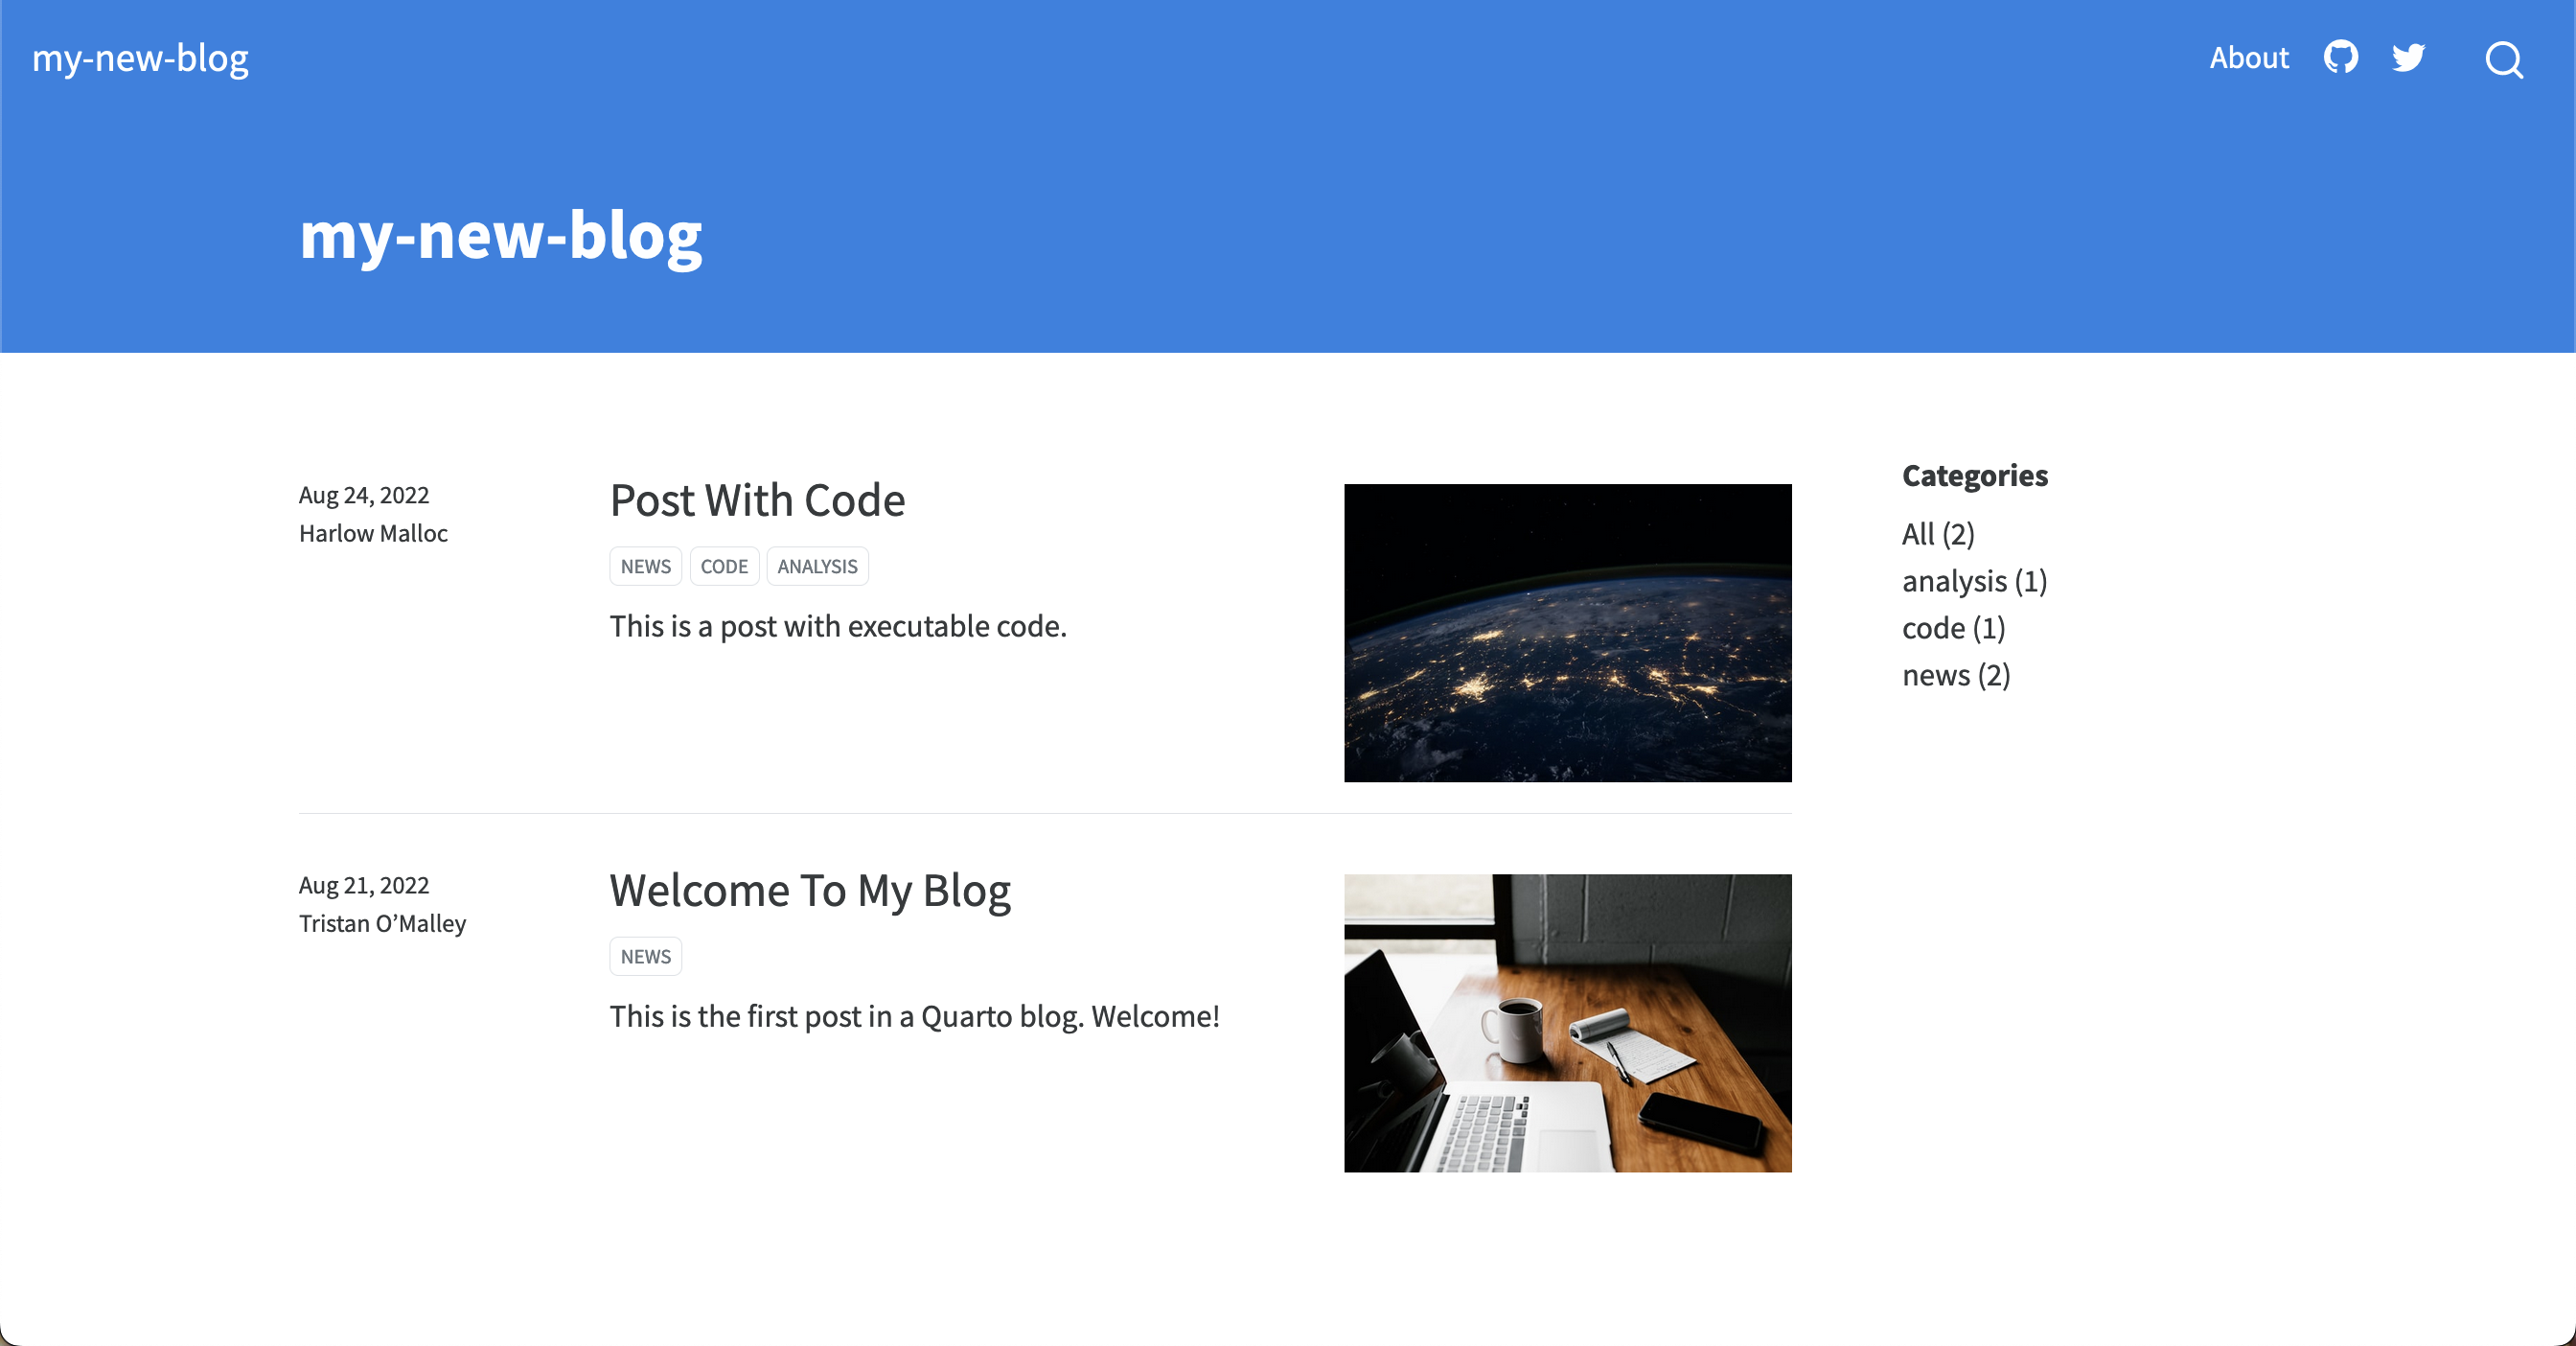
type: defaultYou can write custom listings in Embedded JavaScript templating (EJS).
Tooting my own horn:
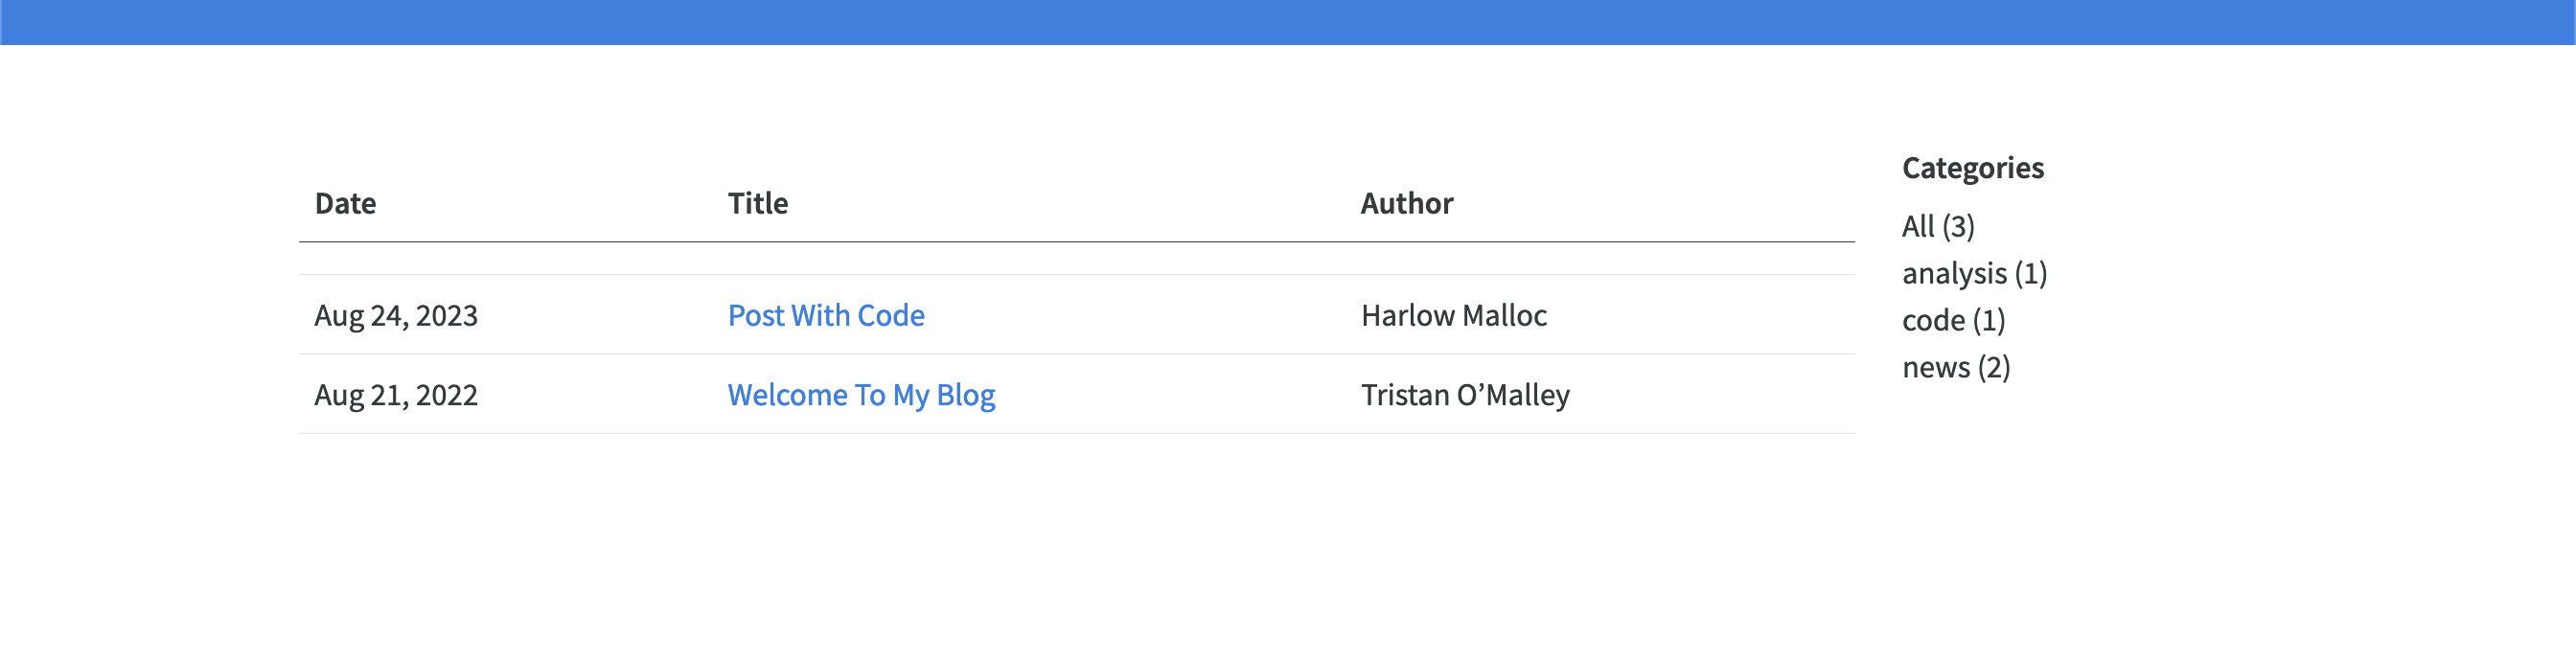
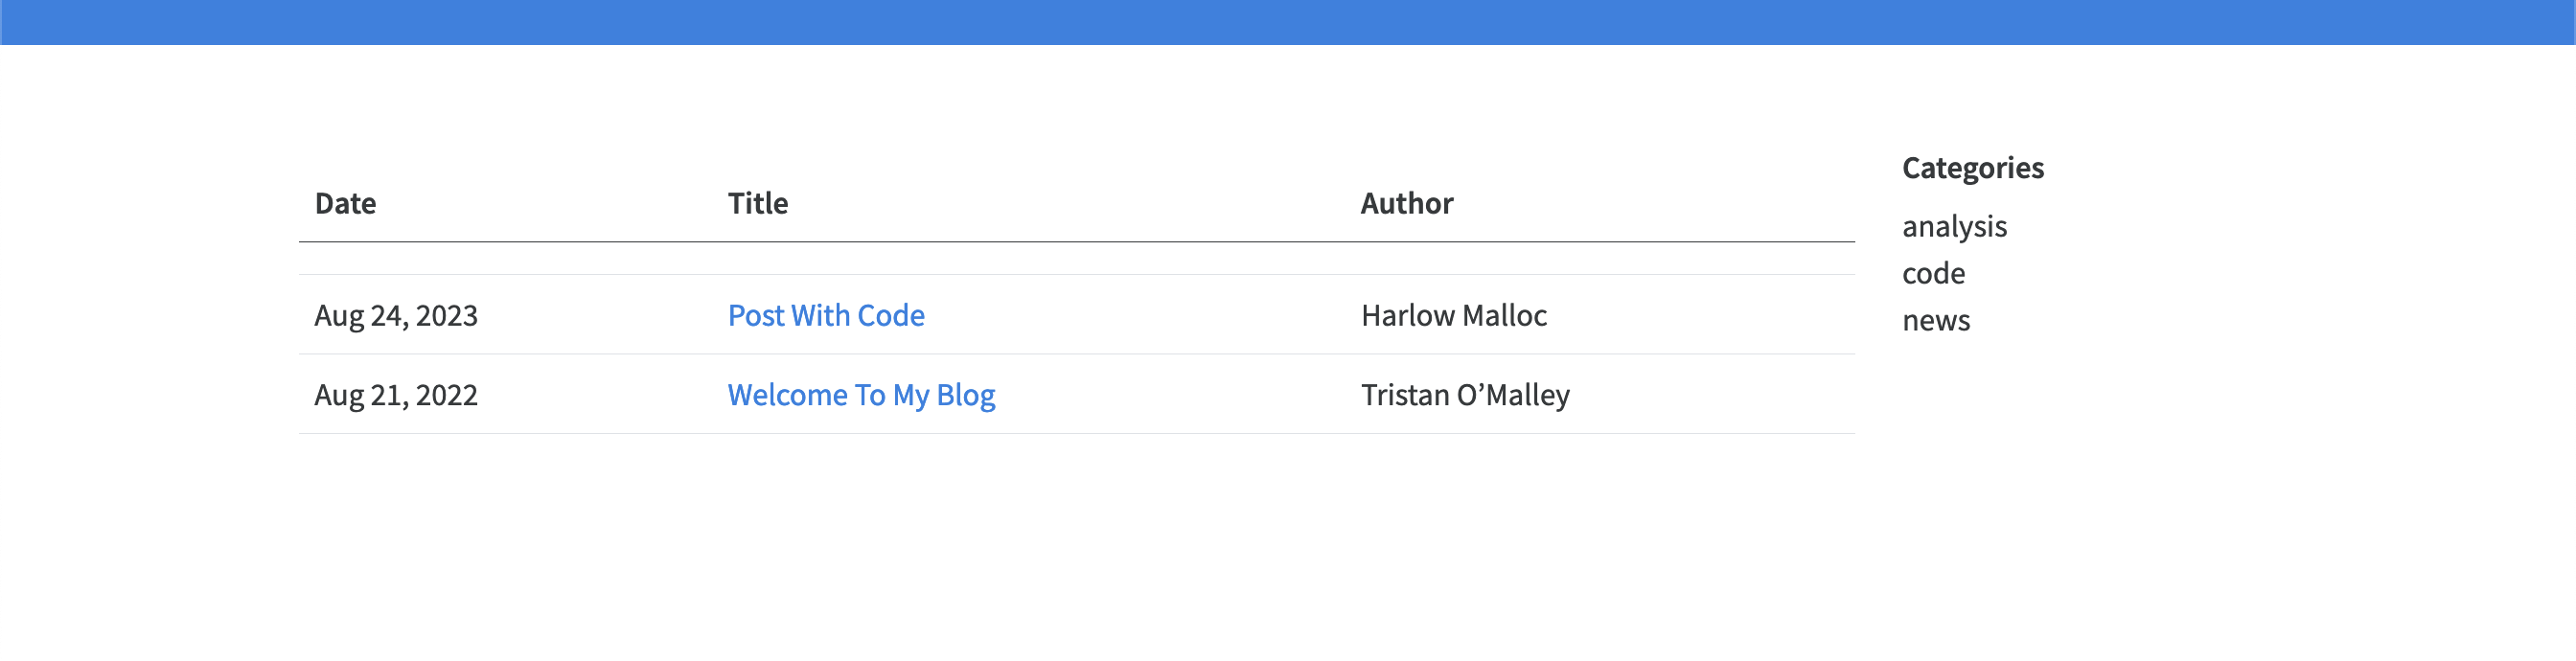
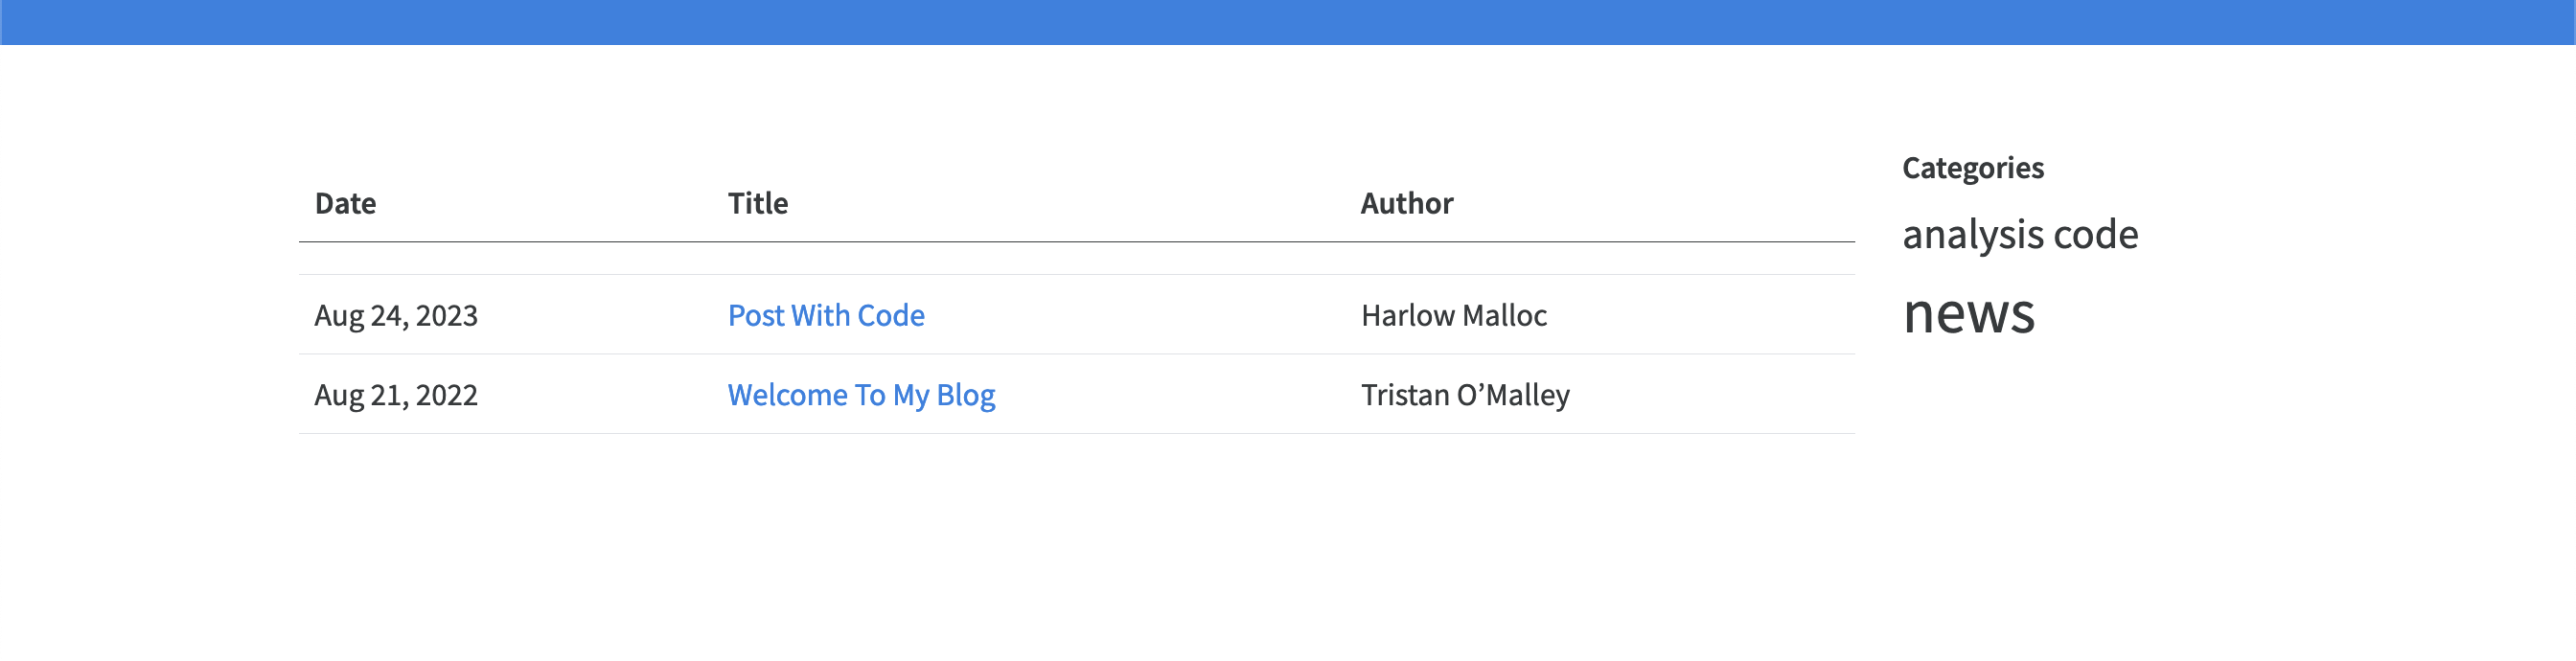
categories
categories display the categories for your posts. The categories are read from the YAML of the documents included in the listing.
categories: true

categories: numbered
categories: unnumbered
categories: cloud
sort-ui
sort-ui provides a sorting box for readers.
sort-ui: true
filter-ui
filter-ui provides a filtering box for readers.
filter-ui: true

page-layout
page-layout controls the layout used.
title-block-banner
title-block-banner positions a formatted title block at the start of the article.
about.qmd: Blog about page
The about.qmd document includes additional information on the blog and its author.

---
title: "About"
image: profile.jpg
about:
  template: jolla
  links:
    - icon: twitter
      text: Twitter
      href: https://twitter.com
    - icon: linkedin
      text: LinkedIn
      href: https://linkedin.com
    - icon: github
      text: Github
      href: https://github.com

---
Let’s go through each line:
title
The title of your About page.
image
The image for the About page.
about
The option to create an About page.
template
template controls how the About page looks.
Five built-in templates:

template: jolla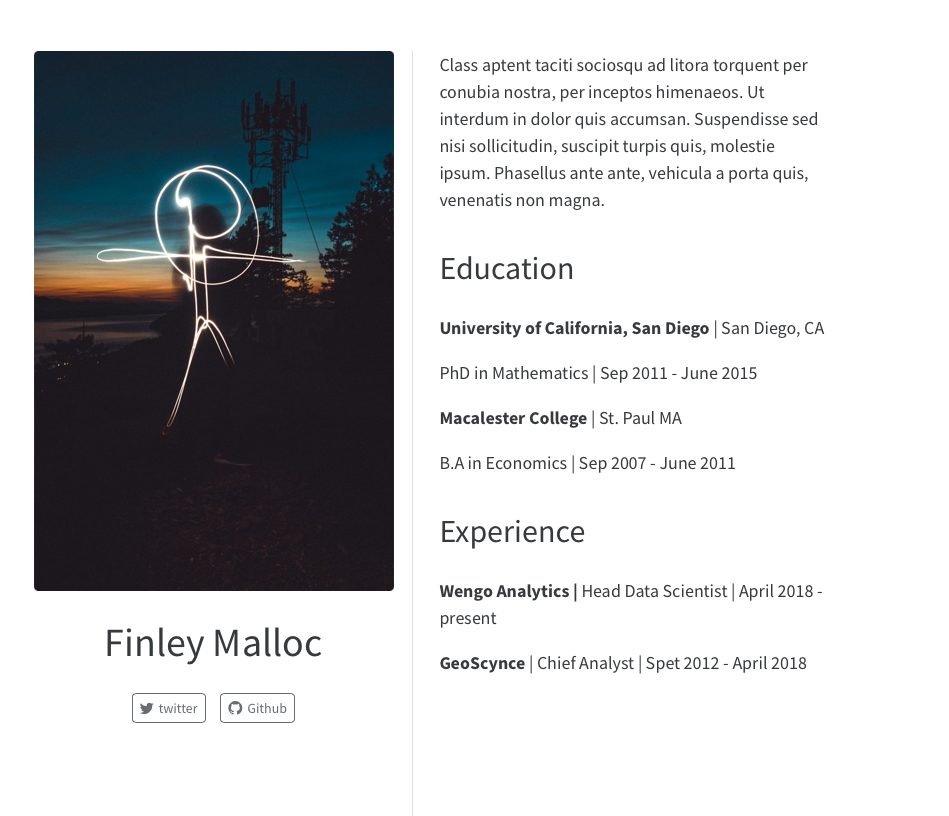
template: trestles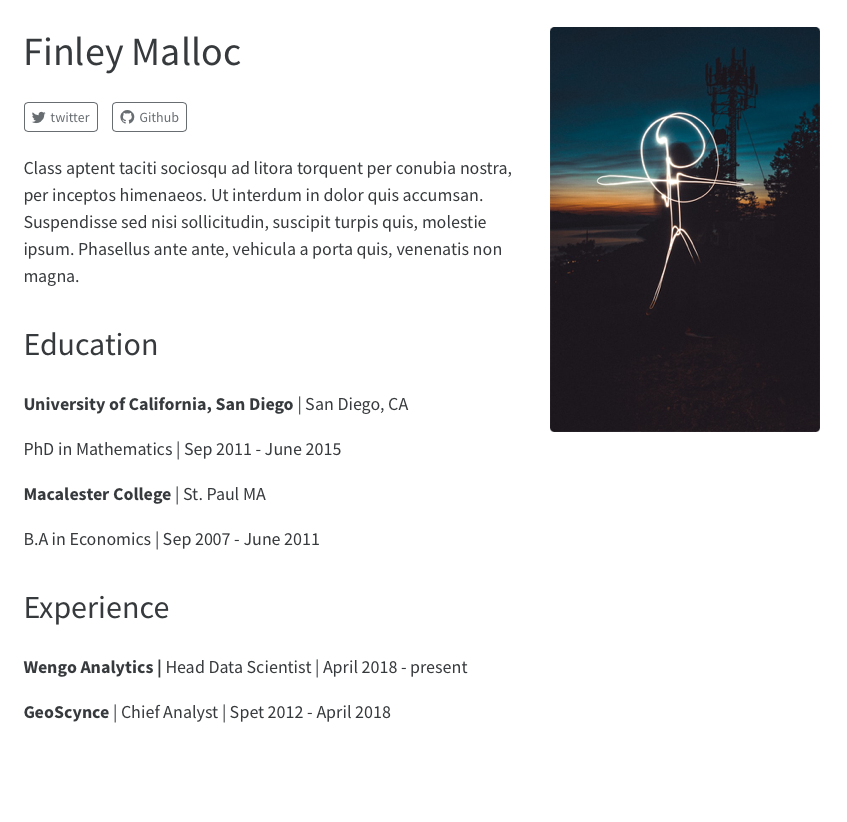
template: solana
template: marquee
template: broadsidelinks
A set of links to other resources.
- icon
One of the standard Bootstrap 5 icons.
text
Text to display for navigation item.
href
Link to file contained with the project or an external URL.
_quarto.yml: Quarto project file
The _quarto.yml file is the configuration file for your website.
project:
  type: website

website:
  title: "my-new-blog"
  navbar:
    right:
      - about.qmd
      - icon: github
        href: https://github.com/
      - icon: twitter
        href: https://twitter.com
format:
  html:
    theme: cosmo
    css: styles.css

editor: visual
Let’s go through each line:
project
The type of project (vs book, etc.).
title
The title of your blog.
right
The option to specify items for the right side of the navbar.
- about.qmd
The file to be linked. The title will default to the document’s title.
- icon
The icon to be shown.
href
The link associated with the icon.
There are other options available for the top level navigation. For example, if we want to change the background to orange, we could add:
  navbar:
    background: "#C45508"
Make sure that you are indenting correctly!
There are also other options for the individual navigation items. For example, if we want to add text to the right side:
  navbar:
    right:
      - text: "my name here"
Quarto top navigation documentation
Themes
This section adds your theme.
The 25 Bootswatch theme names:
- default
- cerulean
- cosmo
- cyborg
- darkly
- flatly
- journal
- litera
- lumen
- lux
- materia
- minty
- morph
- pulse
- quartz
- sandstone
- simplex
- sketchy
- slate
- solar
- spacelab
- superhero
- united
- vapor
- yeti
- zephyr
format:
  html:
    theme: cosmo
    css: styles.css
Blogs can use any of the 25 Bootswatch themes included with Quarto, or you can create your own theme.
format:
  html:
    theme: cosmo
    css: styles.css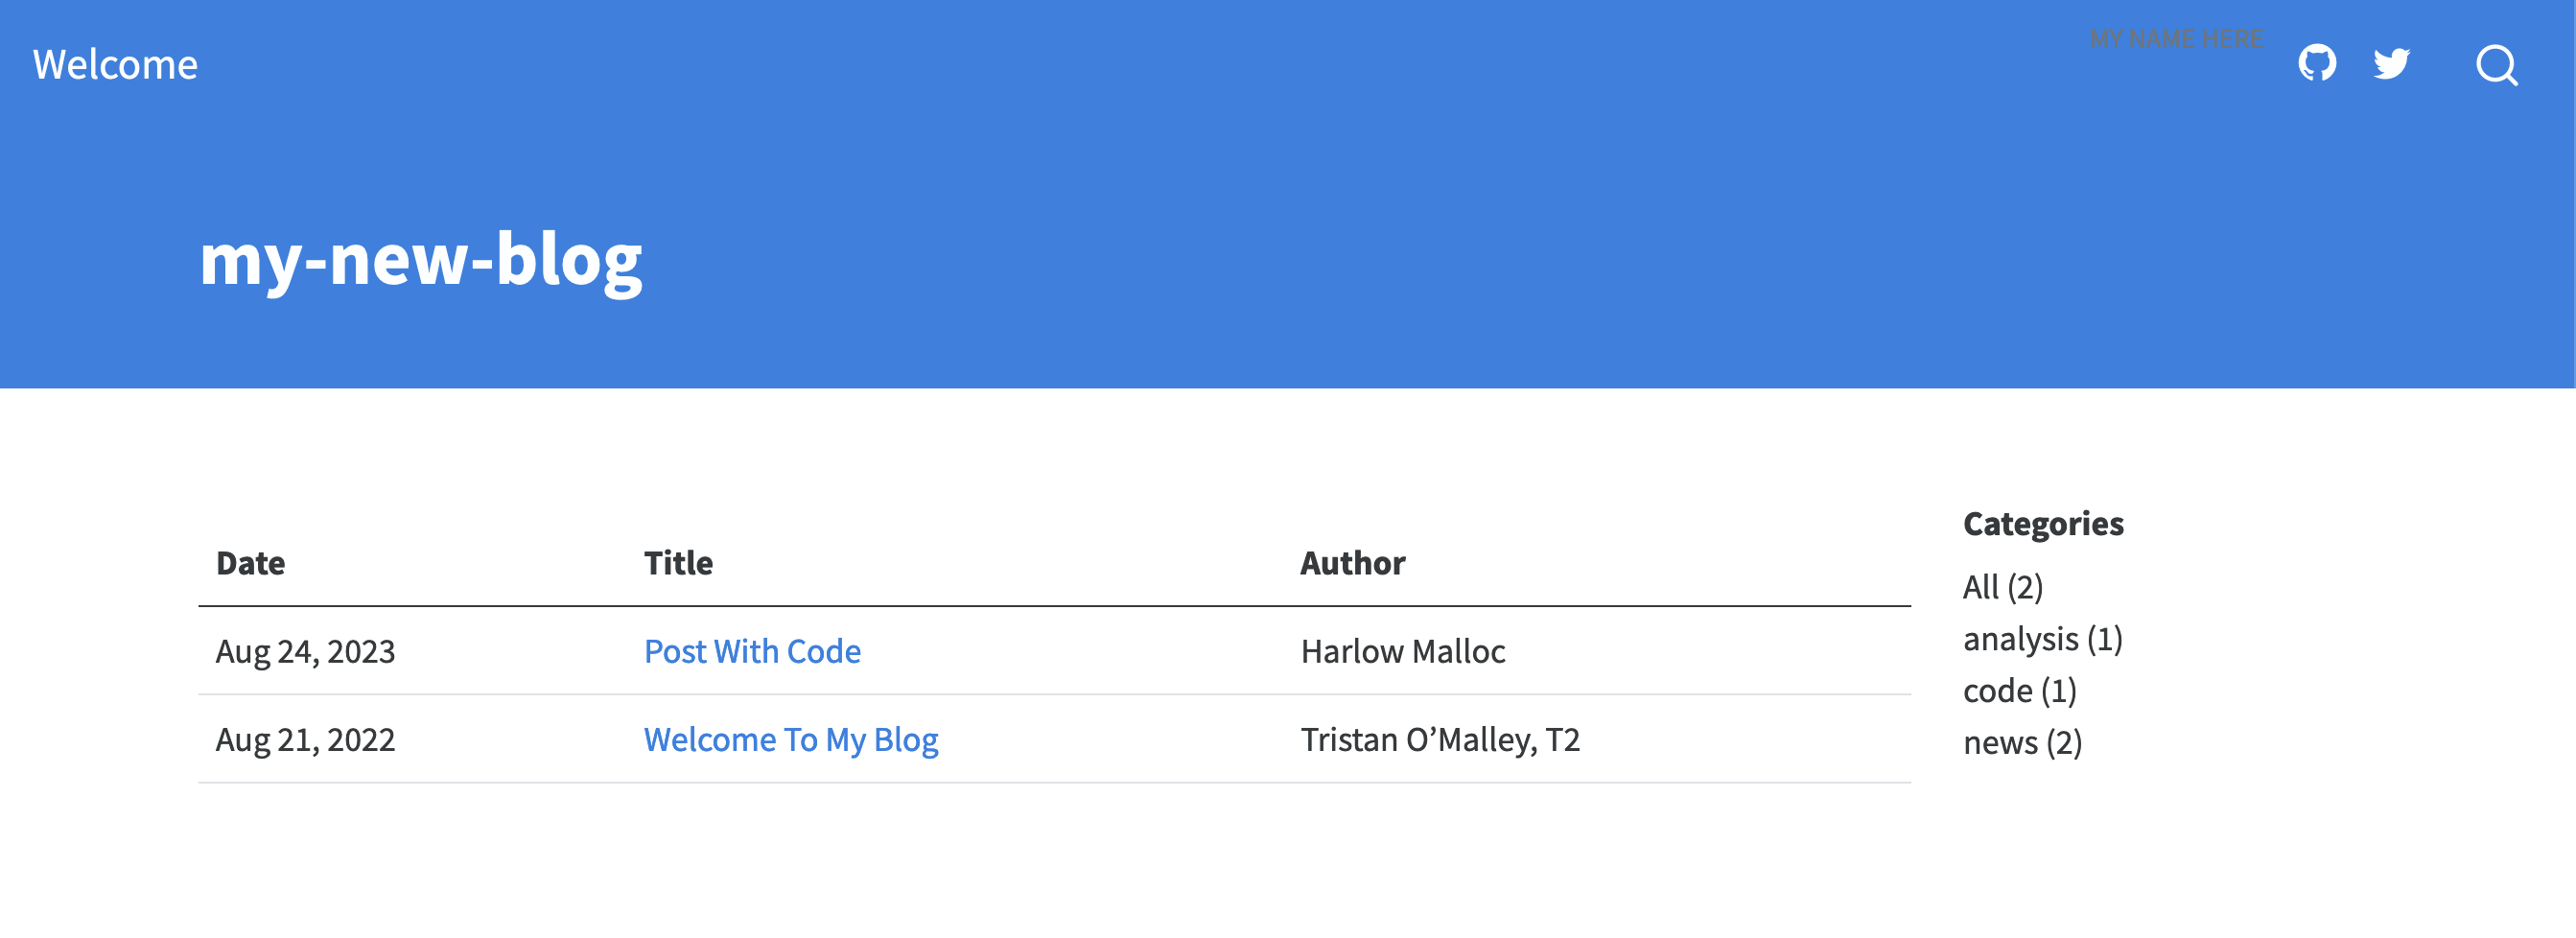
format:
  html:
    theme: darkly
    css: styles.css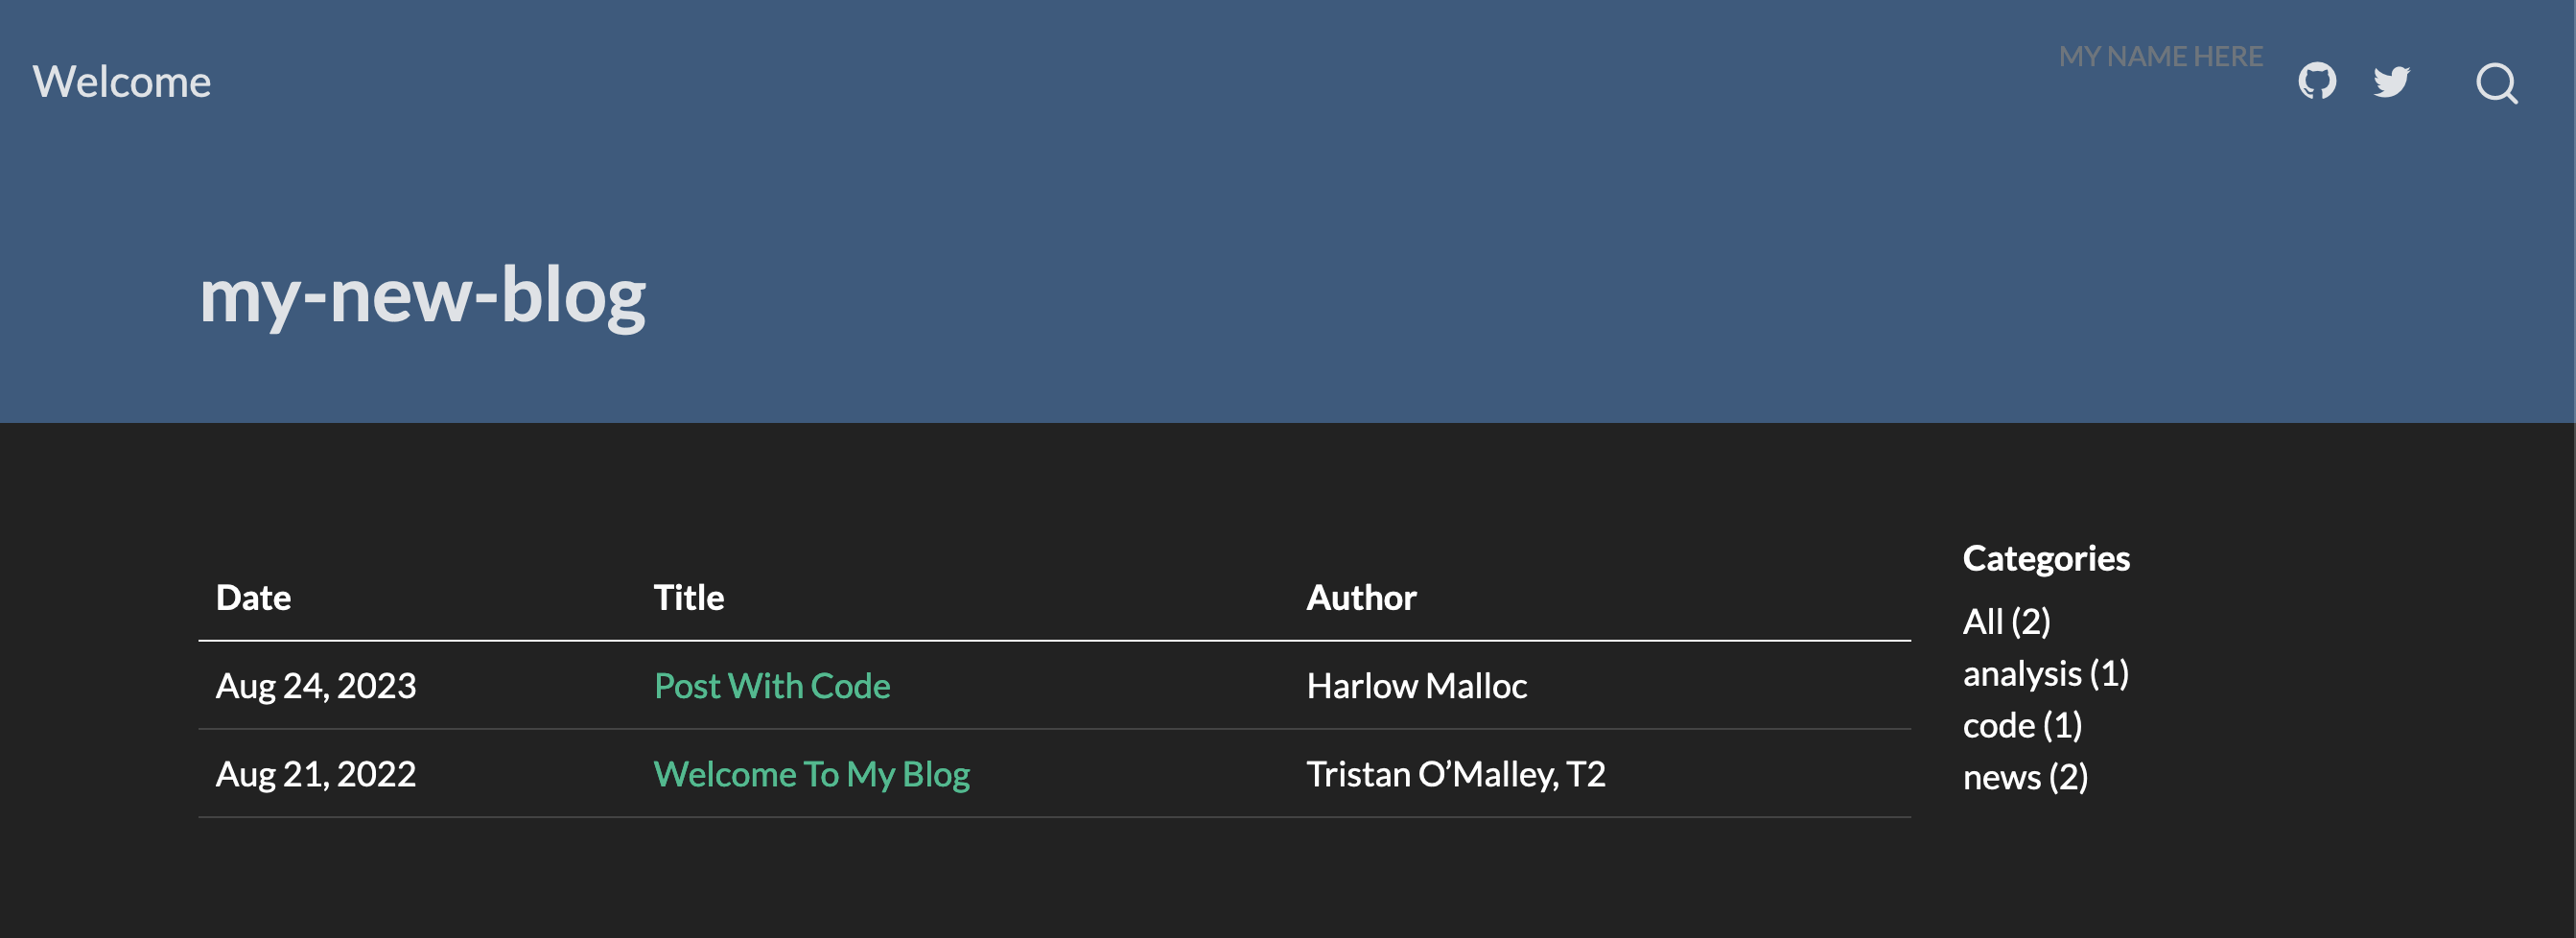
format:
  html:
    theme: sketchy
    css: styles.css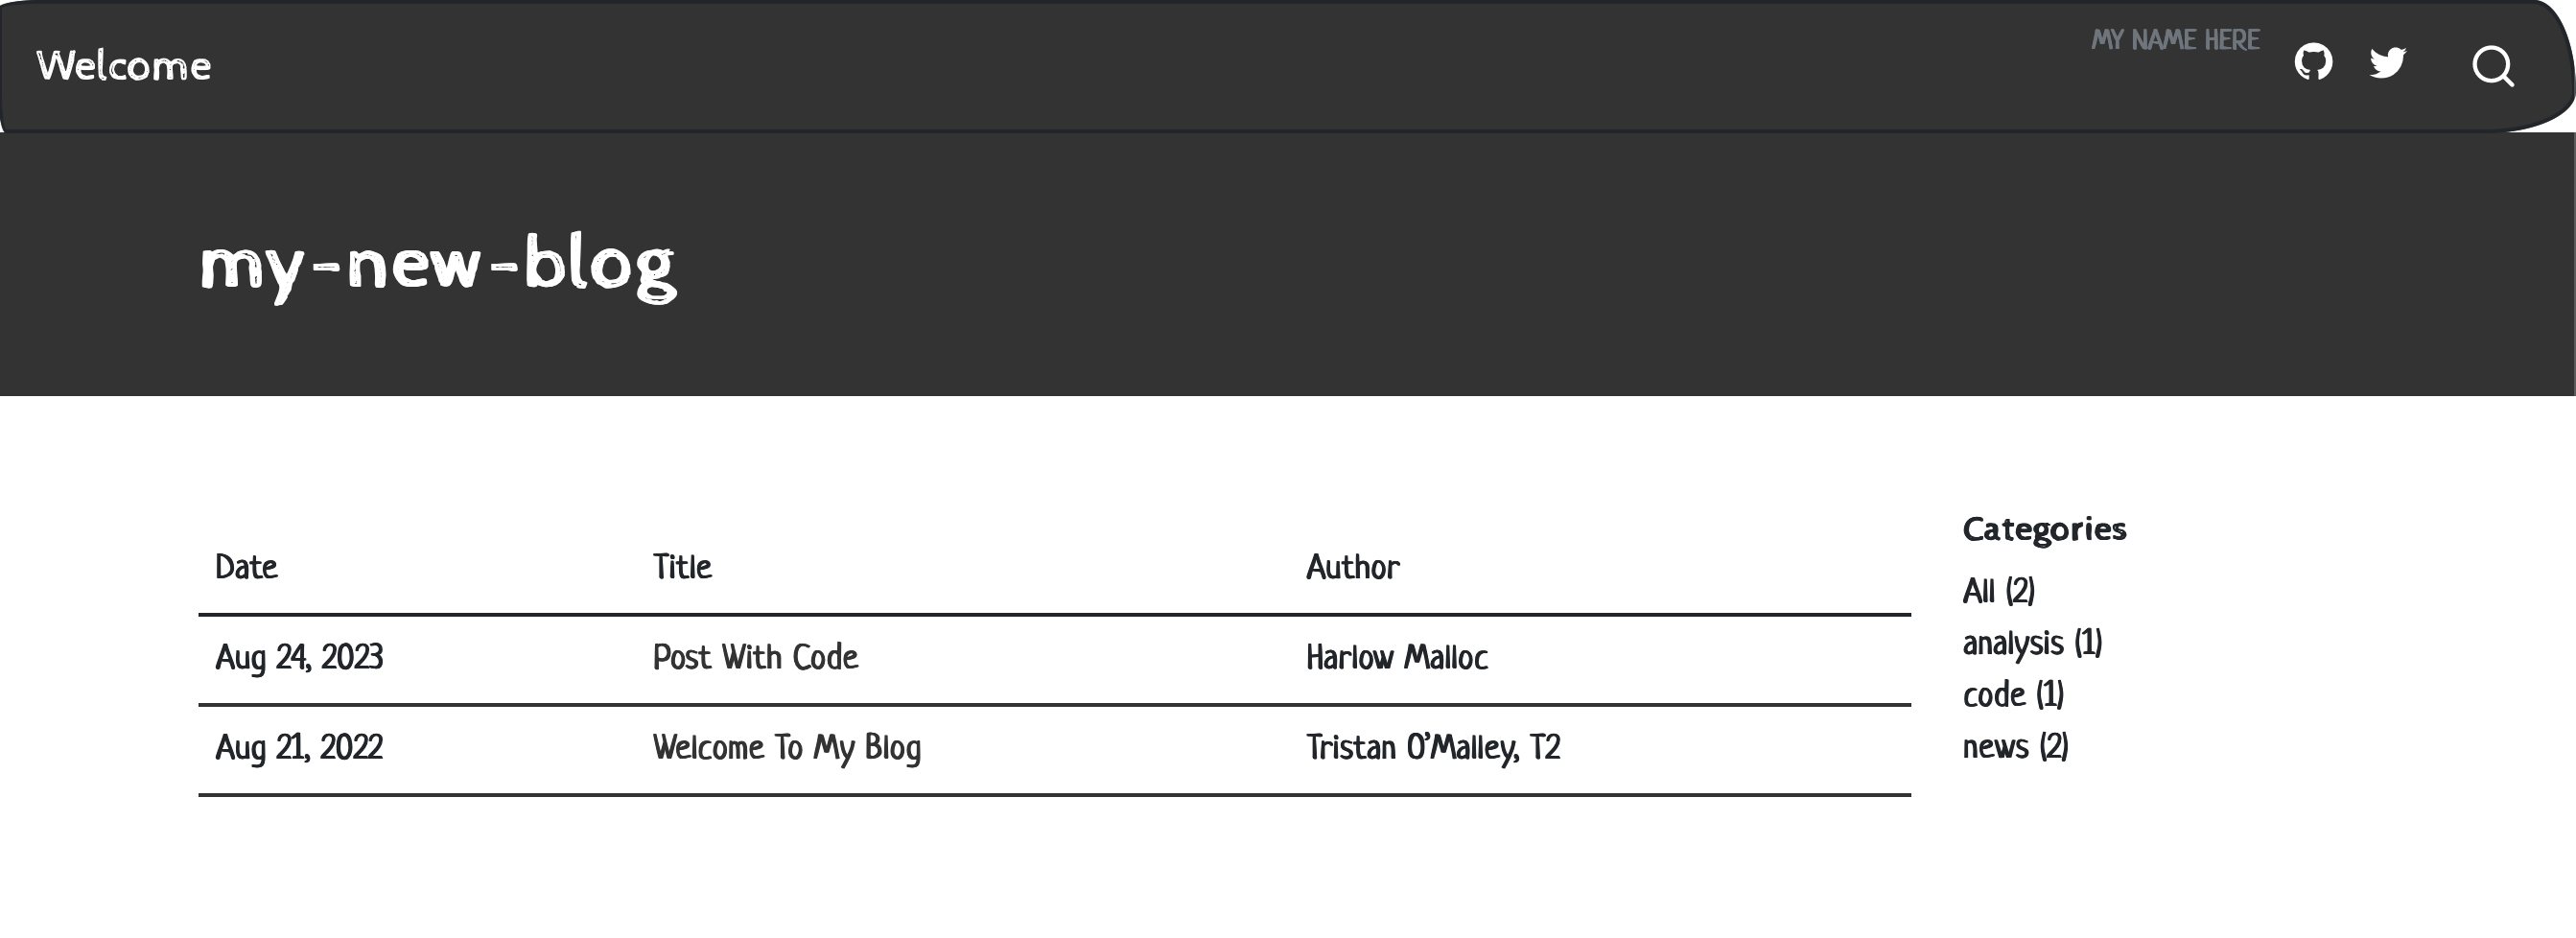
Dark themes
Quarto websites also support light and dark themes. A toggle will allow your reader to select the desired appearance.
Specify under theme:
format:
  html:
    theme:
      light: cosmo
      dark: darkly
Syntax highlighting
You can also change the syntax highlighting for your code blocks. Run the below to see all the options:
quarto pandoc --list-highlight-languagesYou can use YAML intelligence to find your perfect highlight style too!
Specify the syntax highlighting style by specifying highlight-style under theme:
format:
  html:
    theme: cosmo
    css: styles.scss
    highlight-style: espresso
format:
  html:
    theme: cosmo
    css: styles.scss
    highlight-style: eiffel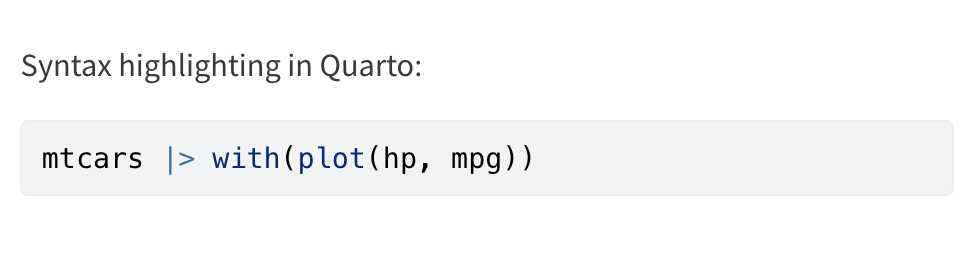
format:
  html:
    theme: cosmo
    css: styles.scss
    highlight-style: zenburn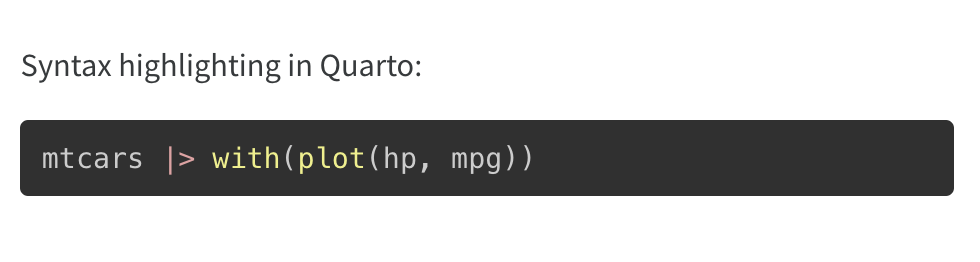
styles.css: Custom CSS for website
This is the CSS stylesheet for your website.
- Can also use
.scssfile.
You have built a blog with Quarto! 🎉